I attended a small fair last weekend in the country side to sell some of my jewelry. I tend to think a lot about how I display them and what else do I need then just a table, exchange money and the jewelry. Before I have ordered some business cards from Thailand but this year I noticed I was out of these cards.
Of course, I had no time to order any from anywhere and I wasn’t even sure I wanted to pay the price they ask here in Finland for them so I decided why not make them myself.
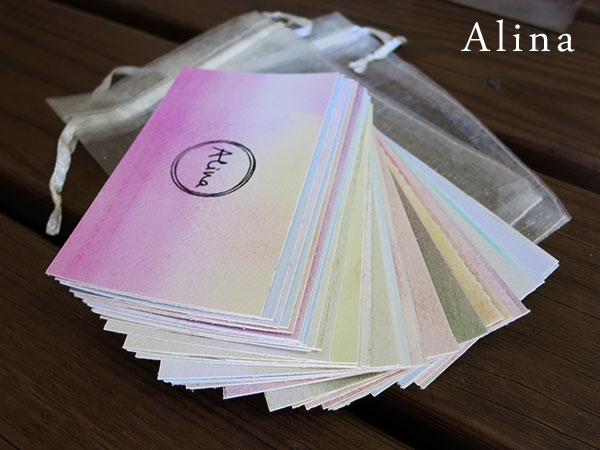
I gave my daughter some water color paper and told her to just go crazy with colors. First we wet the paper pieces and then colored them with watercolors. If you do this make sure that the paper is thick enough and don’t worry about the paper going all wavy. After the papers had dried I put them under a pile of books for a few days to straighten them out.
After the papers had straightened out I cut the papers into business card size. I used these parameters: 86 mm x 54 mm.
The edges of the cards were a bit rough which did not matter to me. This was due to my cutter being a bit old but I actually did want some edge to the cards. It made them more interesting. 

After the cards were all cut out I went through my stamps to see if I had anything I could us. I ended picking out a rough circle that I thought went quite well with my logo here in the blog. I did a few tests first to see what I exactly wanted and I just ended up writing my name in the middle of the card. Note, I had to test several black pens that I had to see what worked best with the watercolor paper.

Then the cards were ready. I also wrote in the back my blog’s address as well as my email if somebody wanted to contact me. Then the cards were ready to be slipped into the organza bags I had for the jewelry.

 I just love the outcome and I do feel the represent me and my jewelry. This was an easy and quick way to get cheap but nice looking business cards.
-Alina


Very cool!! I’m going to try this. Thanks for sharing 🙂
Thanks! I really liked them myself as well. Next time I think I’ll go for some more color. It is just a big playground.
I really like your business cards too. I made some to share my Flickr site with other cardmakers. First of all I made up a sheet on the computer with my Flickr address onto some very nice cardstock. Then I cut them up and stamped flowers and leaves around the address with small stamps. I like this process because I can change them quickly if I want a new design. If you want some more colour next time you make them, I have seen some lovely examples on Pinterest. In one of them, the cards were tied together with an elastic band and dipped into some inky liquid and left for the colour to wick upwards on the card – what a neat idea!
Thanks Kate! I think I’ve seen the dipped cards actually and the outcome was lovely. It’s also a really quick way to get a big pile of cards colored. I really do want to maybe get some more pop to the cards the next time I’ll do some more. it’ll be interesting to try different techniques.
Pingback: 5 DIYs you will LOVE: Date Cards + Instagram Box + Magazine Wall Art | Alliexperience